


Tips to Get Started
Here are a few pointers before you get started making your own kombucha. Make sure you use organic cane sugar- do not substitute other types of sugar. Also be sure to use filtered, non-chlorinated water (non-fluoridated too if possible). I use a Big Berkey water filter to remove the chlorine, fluoride and other contaminants from my tap water. Finally, make sure to use regular caffeinated organic black tea. Both caffeine and sugar feed the scoby.
What Is a Scoby?
A scoby is the weird looking object floating at the top of my kombucha picture. It is what turns your tea into a probiotic and enzyme-rich carbonated drink. The word SCOBY is an acronym for a Symbiotic Culture of Bacteria and Yeast. You can purchase a dehydrated scoby at Cultures for Health or on other websites. You will just need to follow their directions to activate their scoby. Or, if you have a friend that already makes kombucha, they will probably have an active scoby they can share with you. An active scoby is alive and continually grows.
Ingredients you will need to get started (see ratios below)
- organic black tea bags
- organic cane sugar
- filtered, non-chlorinated water
- starter tea (saved from previous batch) or plain, unflavored, store-bought raw kombucha
- an active kombucha scoby
Tools you will need: 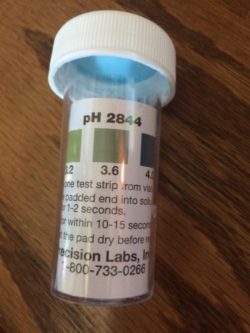
- 1 gallon, 1/2 gallon,or a quart size glass brewing vessel depending on how much you want to make (and the size of your scoby) – see below
- tight-weave cloth or towel
- a large rubber band
- saucepan
- large spoon
- kombucha pH paper (you want a pH paper that tests in the 2.8-4.4 range of pH) -(optional but recommended)
- empty,store-bought kombucha bottles with lids
- mid-sized funnel(made with food grade plastic or stainless steel) for decanting kombucha into bottles
- a stainless steel ladle for decanting
- distilled white vinegar (for sanitizing your hands and dishes
- food thermometer (optional)
Kombucha Tea Ingredient Ratios:
It is important to have the correct ratio of your ingredients. If your kombucha scoby is small (approximate volume to one measuring cup) then you should start with a one-quart batch. If you have a large scoby but only wish to make a small batch, then you can divide your scoby (with hands sterilized with white vinegar) and keep the extra in a scoby hotel. (see below)
One-Quart Batch (good for a scoby about the volume of one cup)
- 2 organic black tea bags
- 1/4 cup organic cane sugar
- 2-3 cups filtered water
- 1/2 cup starter tea (saved from previous batch) or plain bottled, store-bought kombucha)
Half-Gallon Batch (good for a scoby about the volume of two cups)
- 4 organic tea bags
- 1/2 cup organic cane sugar
- 6-7 cups of filtered water
- 1 cup starter tea (saved from previous batch) or plain bottled, store-bought kombucha)
Gallon Batch (good for a scoby about the volume of three cups or more)
- 8 organic black tea bags
- 1 cup organic cane sugar
- 13-14 cups filtered water
- 2 cups starter tea (saved from previous batch)or plain bottled, store-bought kombucha)
Instructions for Making Kombucha Tea:
Make sure all of your equipment is sanitized with white vinegar before you get started-especially your brewing vessel and your hands before touching the scoby. I usually pour a few cups of white vinegar in a small bowl and “dip” my equipment in there to sanitize it. Pour excess vinegar off your equipment and don’t rinse with water afterwards.
- Bring your filtered water to almost boiling in your saucepan
- Pour the almost boiling water into your sanitized brewing vessel
- Add sugar and stir to dissolve
- Place the tea bags in the hot sugar water to steep.
- Once the tea is cooled to 85 degrees F or less, remove tea bags with a sanitized spoon, squeezing gently to release excess tea back into the vessel.
- Add starter tea to the cooled liquid. stir to mix.
- With clean and sanitized hands, add an active scoby
- Cover the jar with a tight weaved cloth or coffee filter and secure with a rubber band.
- Store jar in an undisturbed place at 68-85 degrees F, away from direct sunlight for 7-30 days or to taste. The warmer the environment and the bigger your scoby, the faster your tea will brew and acidify. You can start tasting after 7 days by carefully reaching a sanitized straw underneath the scoby to draw out a small amount of tea. The taste should be a pleasing mixture of sweet and tart flavors. Beginners may feel more comfortable testing the kombucha’s pH to make sure the tea is brewed appropriately. The desired pH of the tea is anywhere from a pH of 2.8 – 3.2.
- Once the desired pH or taste is reached, with washed and sanitized hands, remove your scoby to a sanitized bowl, cover with a little brewed kombucha from your vessel and cover with plastic wrap to keep fruit flies out. (This is only a temporary home for your scoby)
- Decant your kombucha with a ladle and a funnel into your kombucha bottles. Remember to save some of your plain kombucha for your next starter.
Bottling and Flavoring your Kombucha:
Flavoring your kombucha adds fizz and flavor to your favorite tea! The yeast thrive on the sugar in your flavoring agent and create more carbonation. A tightly fitting lid keeps the carbonation in the jar and creates an anaerobic atmosphere which yeast love. Ideas for flavoring an 8 ounce jar of kombucha (choose one or more flavorings):
- 2 tablespoonfuls of fresh or frozen fruit or fruit juice
- 1 tablespoonful of dried fruit
- one tablespoonful of fresh grated ginger and some honey and/or tumeric
- 1/8 teaspoonful of organic flavor extracts like vanilla or almond
Bottling tips:
- Add flavorings to empty bottles before decanting tea into them
- Add tea up to the top of the bottle leaving only a 1/4 inch of headspace.
- Cap the jars tightly using a small sheet of waxed paper under the lid. The wax paper will keep metal lids from corroding and will also help keep the carbonation inside the bottle.
- Leave the flavored bottles at room temperature for two days to allow the flavors to mix and the yeast to thrive before refrigerating.
Storage of Your Scoby and Scoby Hotels
Once you are done brewing a batch of kombucha tea, you need to decide if you are ready to make another batch or if you want to take a break. If you want to make another batch, then you just reuse the scoby in the recipe above. If you wish to take a break, however, you can create a scoby hotel.
To make a scoby hotel, you simply make a one quart batch of kombucha tea (the volume of scoby will generally be much bigger than called for in the recipe above) add the scoby or scobies, and leave the tea unattended for up to six weeks. After six weeks, the resulting brew will be very sour and can be thrown out. (although you will want to save some of it to use as the starter for your tea) Every six weeks, pour out most of your old brew and add freshly brewed tea (tea, water, sugar-the starter will already be in the jar) Scoby hotels are great for taking a break from making kombucha. Scoby hotels also allow you to have a spare scoby on hand. It is a good idea to have a spare scoby in case your main scoby becomes contaminated. Cultures for Health has some great pictures of what a healthy and an unhealthy scoby looks like.
Summary of Making Kombucha
The method I described above for making kombucha is very basic and designed to get you started making your own from home. As you get into the brewing routine, I encourage you to look at other recipes and experiment with other varieties of kombucha tea. Just remember to keep a back up scoby hotel in case something goes wrong with your main scoby. Making your own kombucha saves money and can be an enjoyable hobby. I wish you success in your kombucha making!